Disclosure

This post may contain sponsored or affiliate links.
Showing posts with label DIY Fixer Upper. Show all posts

Saturday, June 24, 2017

Basil: Keys to A Healthy Crop

The key to great basil is trimming and avoiding pest and infection problems.  It took me years to perfect my technique and this year I have the healthiest, most productive, vibrant plants I've ever had!  I wanted to share my technique with you to that you too can have great basil plants too.


Throughout Your Basil's Life...
First, and perhaps most importantly, you need to maintain a consistent basic maintenance schedule with your plant.  This includes protecting it from pests and infections and making sure it has adequate nutrients.   This starts from the day you plant your little seed into the pot and continues until the plant has finished producing.

1. Apply a multi-use organic topical treatment.  I use one that treats for fungal infections (we live in a very wet humid climate, so this is necessary for our potted plants... it might not be necessary if your in a cooler less humid area or if your plants are kept indoors), insects (such as aphids and beetles), and bacterial infections.  Beginning the treatment when the plant is young will help keep it from developing severe infestations and infections later.

2.  Maintain topical treatment on a schedule.  The multi-use treatment I use says it should be reapplied each month, so I mark on my calendar which day I need to re-treat.

3.  Monitor your plant for signs of infection and manually remove infected leaves  or insects as necessary.  Make sure to remove the infected leaves COMPLETELY.  Don't leave them in the soil to decompose as that could spread the infection elsewhere.

4.  Fertilize on a schedule.  I use an organic vegetable safe fertilizer on my edible plants.  Follow the directions on the box/bottle so that you don't over fertilize (which can lead to plant death).  I prefer the fertilizers that mix with water and you apply manually.  I have found the pellet fertilizers that promise continual release over 3 months to be inadequate.

5. Fertilize the SOIL ONLY.  Many fertilizers say that you can fertilize directly onto the leaves and fruit of a plant.  I have found that to be bad advice for multiple reasons: first, it has the tendency to burn the leaves (very bad on basil!), second, it tends to lead to a "wet" plant which can encourage fungal growth, and third, remember your going to be eating these leaves so why would you want to add additional chemicals to something you eat?! Just keep the fertilizer off the leaves.

6. Fertilize on a schedule.  You can't just fertilize once and forget it.  You have to maintain a schedule of fertilizing.  Think of it this way:  you put food into your body every 4-6 hours so that you can be healthy and strong.  Plants are the same.  They need a consistent  nutrients to grow healthy and strong also.  The fertilizer I use must be applied once a week.

My brand new little Baby Basil seedlings about 3 weeks after planting them.

Keep Your Basil In Bush Form...
The most critical part of growing Basil is keeping it in a small bush form.  Basil that isn't pruned to keep a small bush form ends up growing tall and spindly and produces flowers long before you are able to fully utilize the delicious leaves.  So here are my tips for keeping your basil pest free and in a small bush form:

1.  Do NOT trim those big leaves. Unless they are infected in some way, leaves should not be individually trimmed.  Not for consumption and not for aesthetic.  Those big leaves are what provides the plant the ability to soak in sun and the plant needs them to thrive.  If you cut off those great big leaves then you are denying the plant the parts it needs to continue to grow more leaves.  This is just asking your plant to die.

2.  Don't trim anything until your plant is more than 6" tall.  I know, it's hard.  You see those delicious leaves and you just can't wait to use them in a recipe!  But you need to wait.  Your plant isn't ready yet.  Be patient.  Typically, if you've bought your plant as a seedling from the store it will be mature enough to trim.  But if your like me and plant from seed, it may take 5-6 weeks before your basil is ready for it's first trimming.

3. Trim the main stalk above the suckers.  This is interesting and it took me YEARS to figure out.  Unlike a tomato plant (which you need to trim the suckers off), the suckers on a basil plant are actually important for keeping your plant thriving.  By timing off the main stalk just above the 2nd set of suckers you will be forcing the suckers to grow.  This will turn them in to the main stalks.  That's right, you'll go from one main stalk (grown straight from your seeds) to two main stalks (from your suckers). Remember, this should be about 6 inches up from the soil!  Don't cut after the first set of suckers on the main stalk, skip to the 2nd set!  See below:


4. Eat what you trimmed!  That's right, this is the part you eat!  Yey!! You finally get to eat some of your delicious basil!!!  Here is what your plants should look like now:

Plants on the left have been trimmed,
 plants on the right are not tall enough to trim yet
5.  Be patient.  Let the suckers grow.  When the suckers begin to grow there will first be additional leaves, then the sucker stalk will shoot up and you will see new suckers beginning to grow off those stalks.  
The suckers beginning to grow into their own stalks.
Original Suckers have grown into stalks
and now have suckers of their own
6.  Trim the Stalks just above the new suckers.  
That's right!  We are doing it again!  Trimming the stalks just above the suckers will make the suckers grow which in turn multiples the number of stalks.  Where you originally had one main stalk, now you will have 4 stalks of delicious Basil leaves.  See below:


7.  Eat what you trimmed! That's right, you get to eat more basil!!   Here is what your plants should look like now:

8.  Keep Trimming the Stalks the grow from the suckers from your previous trims and eat what you've trimmed! 


9.  Basil Multiples.  Here is the beautiful thing about basil.  It multiplies.  That means that by the time you've gotten to your 2nd or 3rd trimming session the plant has begun to make new shoots at the base of the plant!  You can see new plants growing in the above picture.   
10.  Trim the new plants as you did the originals.  Keep trimming the originals too.  Eat what you trim.  Eventually you will have more basil than you can eat!  

Other Things To Keep In Mind...

1.  Always trim with clean sheers and make sure the cut is clean (no jagged cuts!).  Using clean sheers (see above pictures for what mine look like) and making sure cuts are clean will help protect your plant from infections.

2.  Water BEFORE you trim.  You never ever EVER want to water a plant AFTER you trim it.  That encourages any bacteria, fungus, etc to get into the fresh wound.  Not good.  If you need to water your plant, make sure to do it before you trim.  

3.  Never water the Leaves.  As I said above in reference to fertilizer, never water the leaves.  Water the soil directly.  

4.  Water consistently.  Your plant looks dry and is starting to wilt?  You've waited too long to water it.  Soil should be moist at all times.  You should never turn the pot into a "swamp" by over watering or let the soil dry out (under-watering).  This kind of "yo-yo watering" really hurts your plants ability to consistently absorb nutrients.  Think of it this way:  if the soil is dry then the plant can't get any nutrients, if the soil is over saturated then the plant's nutrients are significantly watered down.  Neither scenario is good.  

5.  Give your Basil the RIGHT amount of sun.  In my garden I have found that it's best to break up the sunning schedule.  My basil gets 3 hours of morning sun and 3 hours of evening sun.  If I let my basil sit in the sun during the heat of the afternoon sun the leaves end up scorching.  Don't expect your basil that is growing in a shady spot to grow well.  Don't expect your basil that spends all day in the sun to grow well.  It's just plant preference ;)

Do you have any tips or tricks for growing awesome Basil?  Please share your thoughts and opinions below!!


Monday, May 8, 2017

The Time We Built a Roof Over the Greenhouse Window

If you've been keeping up with the previous posts (The Time We Planned the Yard and The Time We Built Concrete Planter Boxes) then you know how much I love to garden.  Well what do you do in the winter?  You want to have fresh herbs and such, but it's just too cold for things to grow!  Well, one of the reasons we fell in love with our Fixer Upper when we first bought it was the Greenhouse Window in the kitchen.  This thing is amazing and we love it! It's great in the summer to start our seeds in and it's perfect in the winter to keep our herbs alive.


Well, after the first summer in our home we realized that while the window is great at keeping plants warm it the sun beaming down into it caused a significant cooling problem in our Kitchen.  All summer long the sun just beamed into the kitchen, making it an almost unbearable room to be in.   We tried closing it off (to make it accessible, but sealed from the rest of the room, but that just made the humidity accumulate inside the window.  So we decided that this wonderful window needed a roof over it to help block some of the overhead sunshine in the heat of the day.  The window would still receive a great deal of morning sun and would stay warmer for our plants in the winter, but some of the brightest hottest sun of the day would be blocked, making our kitchen much more hospitable.

This window also had water problems that we needed to address.  Even after filling and resealing the wood under the window we were still having moisture problems in the siding below the window.  We theorized that rain was running down the window supports and saturating the wood causing the problem.

Thankfully, this turned out to be a great little afternoon project!  Here are the basic steps to building a roof over a greenhouse window:

Building a Roof Over A Greenhouse Window...
1.  Measure the window. This sounds obvious, but for the sake of our DIY followers I'll point out the need to measure the top edges of the window to make sure that you get adequate coverage and slope to the roof.
2.  Take off any trim pieces near window.  Our window had a piece of trim along the top edge that we wanted to use to cover the flashing at the top of the new roof.  So we removed it and set it aside to use later.
The trim taken down and the latter set up so we can measure the window.
3. Cut 2x4s to the dimensions of the frame for your roof.  Notice here how we made the outer edge come just outside of the window brick block frame.  We also made the slope of the roof frame steep enough that the bottom of the 2x4 would come to just above the brick block frame of the window (thereby protecting the top of the window).

4. Attach the frame to the Siding.  As you can see here, my husband attached the rectangular bottom part of the frame directly to the siding around the window.  He then attached the sloped 2x4s directly to the rectangular frame and the siding.
Constructing the Frame
5.  Prime and Paint Your Frame. This part is important.  You want to paint and prime your frame to match the trim of your window and house.  This happens now instead of at the end of the project because it is difficult to access the interior of the frame (which is visible from the kitchen) if the roof is in place.
Roof Frame is primed and painted.
6.  Measure Your Frame.  These dimensions will be different than the dimensions of the window.  Because you built the frame directly to the house you need to double check the measurements.  My dad always said "measure thrice, cut once".  

7.  Cut Plywood Board to 2 inches Larger than the Size of the Frame.  This will allow the frame to overhang roughly 1 inch on all sides of the frame.

8.  Paint the underside of the Plywood Frame Black.  This makes the reflective light less inside the room where the greenhouse is and allows it to be aesthetically pleasing from inside (you can see this area through the window).

9. Lay a Moisture Barrier Down on the Plywood.  This will help protect your plywood from rot.

10.  Attach the Plywood with Moisture Barrier to the Frame.  Screws are more reliable than nails, just make sure to get screws that are long enough to really connect with the frame.

11.  Place Flashing Along the top Edge of the Roof.  Ours is hidden behind the trim and runs about an inch under the shingles. 

12.  Attach Singles to the Plywood.  We used our nail gun to attache the shingles, but shingle nails would probably also work.  Just make sure that the nails do not go all the way through the plywood because they will show on the underside. Make sure to allow your shingles to overhang the edge of the plywood by at least 1/4".

The finished Greenhouse Window Roof!
14.  Reattach the Trim.  Take care to cover the top of the flashing and make sure to keep the trim lined up with the existing trim.  

15.  Touch up Paint As Needed.  It's inevitable that you will have nicked the siding a bit or that the trim will need to be touched up.  

Do you have one of these unique windows in your home?  What is your reaction to them?  Our Realtor seemed to think it was an "odd window" but we found it's character and purpose charming!  Share your comments below.


Friday, May 5, 2017

The Time We Built Concrete Block Planter Boxes

A garden is important to me.  I like to grow fresh vegetables and I like to work outside with my children.  So when my husband and I bought our house at the end of April I made creating a garden area a priority.  Little did I know it would take us until the first week in June to actually move in (read about this experience here: The Time It Took Us A Month To Move In).  Of course, this is South Carolina, where planting season starts in the beginning of March, so I was already MONTHS behind getting my garden ready.  I started by planting seeds with my little ones in some small pots on the front driveway.  Squash, Zucchini, Green Beans, Tomatoes, Basil, Rosemary, and Bell Peppers we planted and I stepped away thinking I had plenty of time to get the garden ready.  I was wrong!

Our first seedlings for the house garden (that had yet to be built).
Apparently, in South Carolina plants grow much faster than they did back in Virginia (which was the climate I was used to).  The hot, humid, sunny conditions in South Carolina made our seeds germinate and begin to grow within the first week and soon I had seedlings that were in desperate need of a permanent home.

We had planned on building planter boxes in the side yard from the beginning.  But we hadn't decided what exactly how we were going to do it.  So, we did what any DIYer would do: we turned to Pinterest and YouTube for inspiration and tutorials.  Here are just a few of our inspirations (which you can find on our Yard Work Board on Pinterest):

https://www.pinterest.com/pin/116249234102083944/
https://www.pinterest.com/pin/116249234101545042/
https://www.pinterest.com/pin/116249234102339145/
https://www.pinterest.com/pin/116249234102820203/

In the end, we decided against wood planters because of the dangers of wood preservatives leaching into our garden soil AND because of our highly humid and hot climate (we were afraid that the wood would mold, rot, or deteriorate too quickly).  And we determined that we wanted larger deeper planters that could also serve as additional seating (remember my previous post where I said we wanted to throw parties in our back yard??) and would provide adequate depth for most of our plants (remember the previous post when I talked about the excessive sand and roots in our yard?).  We also wanted the ability to potentially turn these planters into mini green houses with covers so that we could still grow outside in the Fall and Spring (little did we know, you can do that in the Coastal South without using greenhouse covers).  


So, after we decided on measurements and calculated the needed materials we set off to LOWES mid morning one weekday.  Of course, just like any other project we didn't fully realize the scope of what we were doing.  At the time, we drove a Nissan Armada.  Big strong car, can carry lots of stuff... well apparently it CAN'T carry 96 concrete blocks, 20 bags of gravel, 20 bags of top soil, a roll of black plastic, and a roll of landscape fabric... We ended up making three trips (yes, THREE TRIPS of loading materials into the car then driving them home and unloading them, then going back and doing it again).  See, if it were just my husband and I doing this it would have been easy.  But remember: we have kids.  They needed to eat, they needed to run, and they don't like shopping.   Needless to say, it took us the entire day to get all three loads to our house and unloaded.

My plants needed somewhere to live, and fast.  So, we did what any exhausted set of DIYers would do:  built them that night.  That's right, as soon as the kids went to bed we set up our work lamps and got started building out planter boxes.

10 Steps to Build A Concrete Planter Bed:

1.  Level the Foundation.  We had a significant amount of roots and debris that we needed to clear before being able to begin the actual building process.  We used a level and made sure that the foundation for our planter beds was as flat as possible.

2. Begin to Lay Concrete Blocks.  Some DIYers will recommend laying a foundation of sand, then gravel before laying the concrete blocks.  This is mostly for drainage and stability.  We opted NOT to do this.  Remember, we live in South Carolina and the ground is mostly sand in the first place, so drainage isn't a real issue.  We decided not to lay gravel under because we wanted minimal settling (remember also that this ground was fairly solid because of dense root compaction, had we added gravel the concrete blocks would have settled more over time as the gravel settled causing it to become uneven).

Step 2: Laying the blocks.  We staggered the levels and stacked them 3 levels high.
3.  Lay Plastic Around Interior Sides.  In between the 2nd and 3rd layer of block lay black plastic down the side of the bottom layers (using the 3rd layer to hold it in place).  This will prevent leaching of moisture through the cracks of the concrete block.  You will probably have to cut the plastic to the appropriate size, making sure to overlap the corners and along the bottom for maximum coverage.

Step 3: laying the black plastic along the interior
 4. Lay Landscaping Fabric. along the bottom interior of the planter bed.  Laying landscape fabric at the bottom allows for infiltration of water (because unless you cover these they will accumulate water from rainfall) but protects the planter from getting growth up through the bottom, which is important in our area because of the tree roots).

5. Check, Recheck, Triple Check Level.  Make sure to check the level for each concrete block that you lay and adjust the ground under the block if it's not level.  Each block is slightly different so you may find that sections need to be re-leveled.


6.  Repeat Process for Multiple Planters.  If your building multiple planters, now is the time to build the next one.  Wait to fill your planters until they are ALL done.  This will save you time while pouring gravel and top soil in the end.

7.  Pour Drainage Gravel in the bottom.  We put enough drainage gravel in the bottom of each to have roughly 6 inches depth (roughly the height of 1 layer of block).  This is a sufficient depth in our area to allow maximum drainage.  Rainfall averages vary, so make sure to do some research on your local climate to find your optimum drainage gravel depth.

8.  Fill in Top Soil.  Fill top soil until the top of the 2nd row of block (about 6 inch depth.  Why leave 6 inches of space at the top?  Top soil will settle, so you'll have to fill in more after the first rainfall.  Plants will also need protection and that 6 inches helps provide that.  If your in an area like ours, rabbits and other small creatures will want access to your little veggie treats, so that 6 inches is like a natural fence to help prevent your plants from getting eaten.

9.  Cap the Tops of the Blocks.  This is something we didn't want to do at first.  We wanted to use each of those block openings for additional plants.  So for the first growing season our planters looked like this: 
The first season, we grew squash, herbs, and strawberries inside the block openings around the planter.


Sure, this gives you optimum space for planting, but do you see the problem it causes in this picture??  Yeah, leaching.  The soil from the perimeter plants ended up seeping through the bottom of the blocks (remember that layer of black plastic we put in there?) and caused a significant amount of staining.  If this doesn't bother you, then sure, use the small areas for planting, but if you find it as unsightly as we do we suggest capping the tops.  We capped them the next summer and were much happier with their usefulness as a seating area AND they stayed cleaner looking.  *you will also see below that we added our fence by that next season, so check out our future post on this!*

See how much more clean and finished they look with caps? 
10.  Plant your Seedlings and Watch them Grow!! Yey!  You've made it through with some beautiful concrete block planter beds!!  Now it's time to fill them with our favorite plants and watch them grow!! Make sure to monitor the water so that you they neither dry out or over saturate.
My two little ones planting rows of Green Beans, Peas, and Wax Beans

We got some great growth in these planters that season! This is just 3 weeks after planting seeds.
We planted our tomatoes in pots so that we could move them to the front yard,
check out my future post about my tomatoes!
Have you made DIY Planter Boxes?  What technique and style did you choose?  Please share your thoughts and stories below.  And don't forget to come back and see our future posts on the Fence, Tomatoes, and all of our other great DIY Fixer Upper Adventures!!

Wednesday, April 26, 2017

The Key To Finding the BEST Yard Sales

I'm a yard sale fanatic.  If I see a sign for a Yard Sale, I will change directions or risk being late to wherever I'm going just so that I can do a quick drive by of a Yard Sale.  You never know what your going to find!  Sometimes people value their used items too high (yes, yes, I get that it was given to you by your dead cousin and that it has sentimental value or that you bought that sofa for $1200, but it's used so it's not worth as much to me and it's outside on your driveway, do you want me to buy it or not?!) but occasionally you will find one of those Yard Salers that really just want to get rid of everything and are willing to negotiate down to anything you ask just to get it off their lawn.  THOSE are the kind of Yard Sales I look for.


Yard Sale type #1: Some people are meticulous about their yard sales.  Everything is well organized, items have been photographed and are available online at social media yard sale sites,  and the yard saler has advertised in all the various locations.  These people have prices marked, sizes separated, furniture cleaned, and toys sanitized.  These are NOT the yard sales that you want to shop at if your looking for a GREAT deal.  These Yard Salers are in-it-to-win-it.  They want to make the most money for their effort and they want you to think that their used junk is worth more than it really is.   They aren't going to bottom line their price because they are hopeful that someone might come along later and pay more.  These are the people that yard sale every weekend.  They are patient and they are waiting for the right customer to come a long.  Again, these are NOT the Yard Sales you want.   Sure, you MIGHT find a good deal at one of these, but is it really worth all the extra effort?  No, not to me.

Yard Sale type #2: The kind of yard sale that you want to go to is the kind that looks like someone just emptied their entire garage onto the yard.  Willy-nilly and crazy looking.  It looks like their house vomited all their crap out into the front driveway and yard.  These people will have piles of things you can't recognize from the road,  They will have dirty sofas, broken chairs, and random bits of stuff.  THESE ARE THE YARD SALES YOU WANT!

You see, the difference between Yard Sale #1 and Yard Sale #2 is that the people in Yard Sale #2 are frustrated.  They are frustrated by the clutter.  They are frustrated by the junk.  They are frustrated by the disaster of random broken things that live in their house with them.  These people aren't in it to make money, no no, they are in it to get rid of stuff.  THOSE ARE THE PEOPLE YOU WANT TO SHOP FROM!  They don't care what you pay for it as long as you'll haul it off their property.  These people are impatient and they don't want to haggle with you.  They just want you to give them an offer and then take their junk away.  You can find some really AWESOME DEALS at these types of yard sale, especially if your willing to put a little elbow grease in.  Yes, you have to dig a bit and you'll have to negotiate prices, but in the end this is a great way to save some money while your fixing up your home.

Here are just a few of the awesome deals that I have found!!

I got these UGLY and Dated Lamps for $1 each.  After coating them in $3 worth of Silver Spray Paint they make BEAUTIFUL Bedside Lamps in the Master Suite!  *Lamp Shade info in future post*


I found these two chairs at different Yard Sales.  The one on the left was covered in white paint and cost me $2.  The one on the right's back was loose (just needed some good old Gorilla Glue, which I always have on hand) and was an odd brown color for $1.  I got a $3 bottle of Spray Paint from Walmart and now they are great Dining Room Table Chairs!! *Read my future post about Creating A Dining Room Table from an Old Door*


 This is a hodge podge of items that I got at a few different Yard Sales.  The Lanterns were $6 for 4 (the glass was broken in some, so I just took the glass out!  Who needs glass?!).  The Coat Rack was purple and only cost $3.  And the Bathroom Shelf was brown and only $1.50!!  So, naturally I used my trusty Spray Paint (Rustoleum Rust Resistant Flat Black for the lanterns because they are outside) and simi-gloss black for the other two.


Here are the finished products! These Iron Lanterns look great outside our back door and around our patio.


The Bathroom Shelf looks GREAT above the toilet in the Kid's Bathroom, which we decorated in a Monkey Theme


*and come back later for another post to see how the Coat Rack gets used!!*

Want more great tips on how to find cheap or free stuff for your Fixer Upper?  Come back and check out our future posts where I will detail how you can find COMPLETELY FREE finds for your home!

Here's a list of the products I used to update these finds:
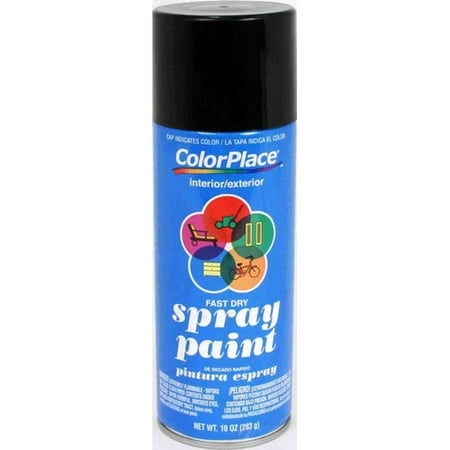
From Walmart, ColorPlace Black Spray Paint


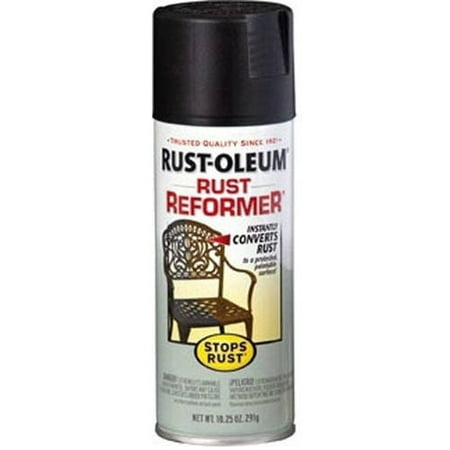
From Walmart, Rust-Oelum Rust Reformer

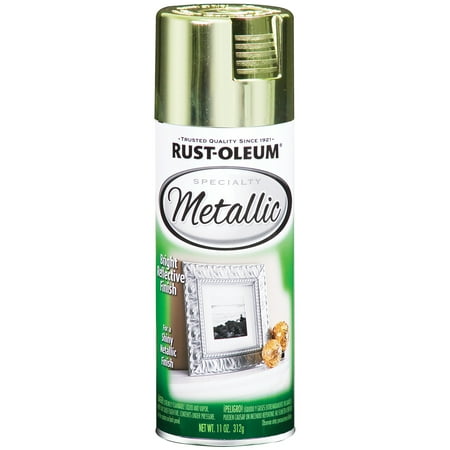
From Walmart, Rust-Oleum Metalic

From Walmart, Gorilla Glue


 Do you have any tricks or tips to find the BEST Yard Sales?  Have you ever found something totally amazing at a Yard Sale that just needed a little TLC to make it new again?  Share your thoughts and comments below.

Thursday, March 2, 2017

The Time It Took Us A Month To Move Into Our New House

We were so excited when we FINALLY closed on the house of our dreams, but upon that re-visit to our newly purchased house we realized that there was NO WAY we could move in.  Not quite yet.  There were two important things that needed to be taken care of before the day we could officially load our stuff into a truck and move it into our new house.  Thankfully, our new house was only 2 miles up the road from the rental we were living in, so while not being able to move right in was an emotional roller coaster, it wasn't too terrible a commute to get the work done.

Our first project on the long list of needed renovations was to deal with the pungent smell of the previous owners who had smoked inside the house.  There was NO WAY we could live in that smell.  Through all of our research, we found that the BEST (and easiest) way to decrease the smell was to paint over it (after a thorough scrubbing with vinegar).  So my husband started the repainting process.

Our sons' bedroom: light green with a bamboo wallpaper accent. 
The first rooms we painted were the kid's rooms.  We felt that it was important for them to feel some ownership in their rooms, so they picked the colors: green for the boys' room and light purple for our daughter's room.  They picked PERFECT colors.  Our sons' room had bamboo wallpaper and our daughter's room had a dark dark DARK purple already, so some added green and a pale lavender would perfectly complement the existing walls.  It took almost a week-and-a-half of painting every evening to do two coats in each room, but we finally got it done and were very happy with the results!  Of course, the baseboards were an oil-based off-white and we planned to eventually repaint these to white... but that's for a future post (in the far FAR future).

Our daughter's room: from DARK purple to a pale lavender.

Next on our list of rooms to paint was the master bedroom.  My husband and I were married in Jamaica and we wanted a cool and serine color that would remind us of our honeymoon and the cool clear waters of Jamaica... So we picked BLUE!!  Of course our off-white baseboards and closets will eventually be painted white, but just like the trim in the kids bedrooms this would be a project for the future.

Master bedroom before and after repainting.  

Master bedroom before and after repainting.
 The process of painting these 3 bedrooms took almost 2 full weeks, but the smell had gotten significantly better.  Originally, we had planned on repainting the entire interior of the house before moving in, but logistically that just wasn't possible considering our time-frame.  So we moved on to the next MUST-DO in order to move in: getting Kitchen appliances.  That's right, the house had NO APPLIANCES.

One of the things that we truly love about our kitchen is that the stove/oven is in the center island.  This gives us a "chef's kitchen" kind of appeal, where we can prep, cook, and serve all in one central location.  It's a great feature in a house that has frequent guests and parties (and a feature that we have enjoyed time and time again), but it's also a difficult feature because very few ovens are made to fit into an island, especially one made in the 1980s!  Think about it this way, an oven against a wall has a ledge along the back that goes vertically up the wall and typically has a hood/microwave above.  Our kitchen couldn't have that.  We had to find a specialty flat-top drop-in oven.

We also love the fact that the kitchen has a space for a corner fridge.  What we didn't realize was that this too was atypical dimensions!  Of course being the DIYers that we are, we wanted to do all the installation ourselves.  But even after searching for the fridge and oven that matched our unique dimensions, we ended up having to cut down cabinets and counter tops to install them.
The hole for the drop-in oven.  My husband had to cut down about an inch on either side to get it to fit (come to find out it was also super grimy under there!  so he had to spend time cleaning it too)
This is what the kitchen looked like while my husband tried to wedge the fridge
between the island and pantry to get it into the corner slot.

It turned out to be a really good thing we stopped painting when we did, because the appliance installation process used up another 2 weeks!  In the first month of owning our new house we were getting a drop-kick course in "every project takes twice as long as you expect".  But, when all was said and done, the extra work before we moved in was worth while. 

The kitchen before and after appliances were installed.
Now we were ready to move in to our Fixer Upper!  Still a work in progress, we added painting trim, baseboards, closets, and renovating the kitchen onto our list of "to-dos" and we began the process of moving our furniture and family into the house.  Living in a Fixer Upper mid-renovations had already become a complicated mess, and we hadn't even moved in yet!  The adventure was looking more and more daunting, but we were exited and ready to take it on.  Every Grimy Detail!

Please share any questions or stories about your own pre-move-in Fixer Upper below.


Sunday, February 26, 2017

Financing your Fixer Upper

People often ask us "how the heck are you paying for all this remodeling" of your Fixer Upper?!?! well the answer is fairly simple and I'll outline it for you below.  Financing our fixer upper is a multi-step process with various funding.

1- Buy a house that's WELL BELOW what you can afford.  Yes, yes... we all know the rule: don't max your budget and buy the least expensive house that meets your needs.  But this is real!  This is primarily how we fund our projects. We bought a house $100,000 under our budget.  Yeah, that's right.  We qualified for a mortgage of $215,000 but we bought a house for only $112,000.  That means that our actual mortgage is only about $130/month (our actual payment is roughly $600/month after taking into account our escrow for homeowners insurance and taxes).  We could have afforded almost $1200/month (which was what we were paying in rent before buying our fixer upper).  That's easy math and easy money: $600 extra per month to play with.  Sometimes we use that money to finance other things (a new sports car and family car) but typical that amount goes directly into our savings account in order to finance house update projects.


2- Put down the MINIMUM amount necessary to qualify for your loan.  Yeah, this is probably contrary to what you've heard, which is to put down as much as possible to make your loan amount as small as possible (thereby decreasing your interest etc...).  Well, this just doesn't make since when you buy a fixer upper.  Chances are that when you buy a fixer upper you will have a lot of upfront costs and unplanned expenses. This means that you need a large chunk of money ready to spend and ready in case of emergency.  Many of our early projects were funded by a chunk of about $10,000 that we had ready.  That's right, I'm advocating for you to have the money in cash BEFORE buying the house in the first place.  This means that you WON'T spend more than you already have.  It also means that you wont be paying interest on additional funds.  CASH, CASH, CASH.  The most important way to finance a fixer upper.  HAVE CASH READY.

3- Whatever you do, DON'T Take out a CONSTRUCTION LOAN.  That's right.  DON'T DO IT. Construction loans are a great way to end up spending more on your home than it's worth.   Construction loans are extremely high interest short term loans that you can use to rebuild or renovate parts of your home.  Unless you bought your home for dirt cheap and the work is being done by a fast-working professional crew, this is NOT the loan for you.


4- Take out a Home Equity Loan as a LAST RESORT.  This is a great last option if you have unforeseen needs that you just don't have the cash on hand to take care of.  For example, you find out that even after passed inspections and clean "bill of health" your home ends up with a serious mold issue that will cost you thousands (or a new roof, new heat pump, hot water heater, flooded crawl space, etc...).  This type of loan takes the amount you owe on your home compared to the estimated value of your home and lets you take out a loan for the difference.  In other words, you will owe what your house is worth.  The danger in this is that there is no fall-back.  Your at your max on your homes' value.  Any more money that you put into the home will put you in the negatives.  Not good.


5. Beg and plead with your relatives for free help.  I just had to throw this in because our family has been instrumental in helping us.  They have offered us free help at every turn.  Their labor is much much cheaper than paid labor and much more enjoyable.  But this brings up a good point: utilize your resources.  Sure, you could probably learn as you go... but if you have a father-in-law who knows how to do roofing, or you have a parent who is willing to do your dirty insulation work, USE THEM.  They want to help, so give them a job.

6. Two Words: Child Labor.  We have three kids.  They LOVE to help us do housing projects.  Painting stuff, scratching stuff up, ripping stuff out, destroying stuff... KIDS LOVE IT.  Give your kids some jobs that they can do.  After-all, it's their house too.


BONUS: Have your husband and kids scower the forest for plants to plant in your garden.  Ok, Ok... it sounds crazy... But for real!  This is how we have been able to plant much of our garden!  We have had the worst time trying to find plants that will grow in our sandy, dry (but strangely often flooded), densely shaded, forested yard.  The best way we have found to find plants that will actually grow in our "native" crazy habitat is to go to the source of the best natural flora: the woods next to our house.

Do you have any other suggestions for how to finance your fixer upper projects?  Please share your comments below.


Wednesday, February 22, 2017

The Time We FINALLY Closed On The House Of Our Dreams

Those of us who are lucky enough to be homeowners know the elation when your offer is accepted on a house.  We know the since of "WAHOOOOO!" that comes with finding out that your going to be a homeowner.  But what we don't anticipate is all the extra work that comes with the closing process.  There are people to hire for pest inspections, home inspections, mold inspections, there are appointments to make (and attend!) for each of those inspections, there is never ending paper work to get loan approval, there's trips to the bank and post office for certified checks and "good-faith" deposits, there are home insurance companies to research and price-check, and there are often bumps in the not-so-smooth road to that final closing day.  This is especially true if you are purchasing a Fixer Upper.


For us, the logistics weren't difficult to fulfill because we had a very helpful mortgage underwriter who was incredibly patient with our late night calls and last minute emails.  We also had a realtor who was more than happy to help us navigate the inspection trenches.  We had been pre-approved for a mortgage that was 2 times the cost of the house we were purchasing so we knew that there would be no re-negotiation of mortgage terms or conditions (more on financing a Fixer Upper in another post).  What we didn't expect was the mortgage approval for THIS specific house.   Apparently, the complications with buying a fixer upper are enormous.  

When you purchase a house, your mortgage company will send someone out to appraise the house.  That means that they will take an inventory of the house's assets and compare the house to other houses of similar age and location.  In our case, the complication was that our house was going to be compared to other 1970's houses of "similar condition and location".  In our area, that meant dilapidated, small, often terrible condition homes.

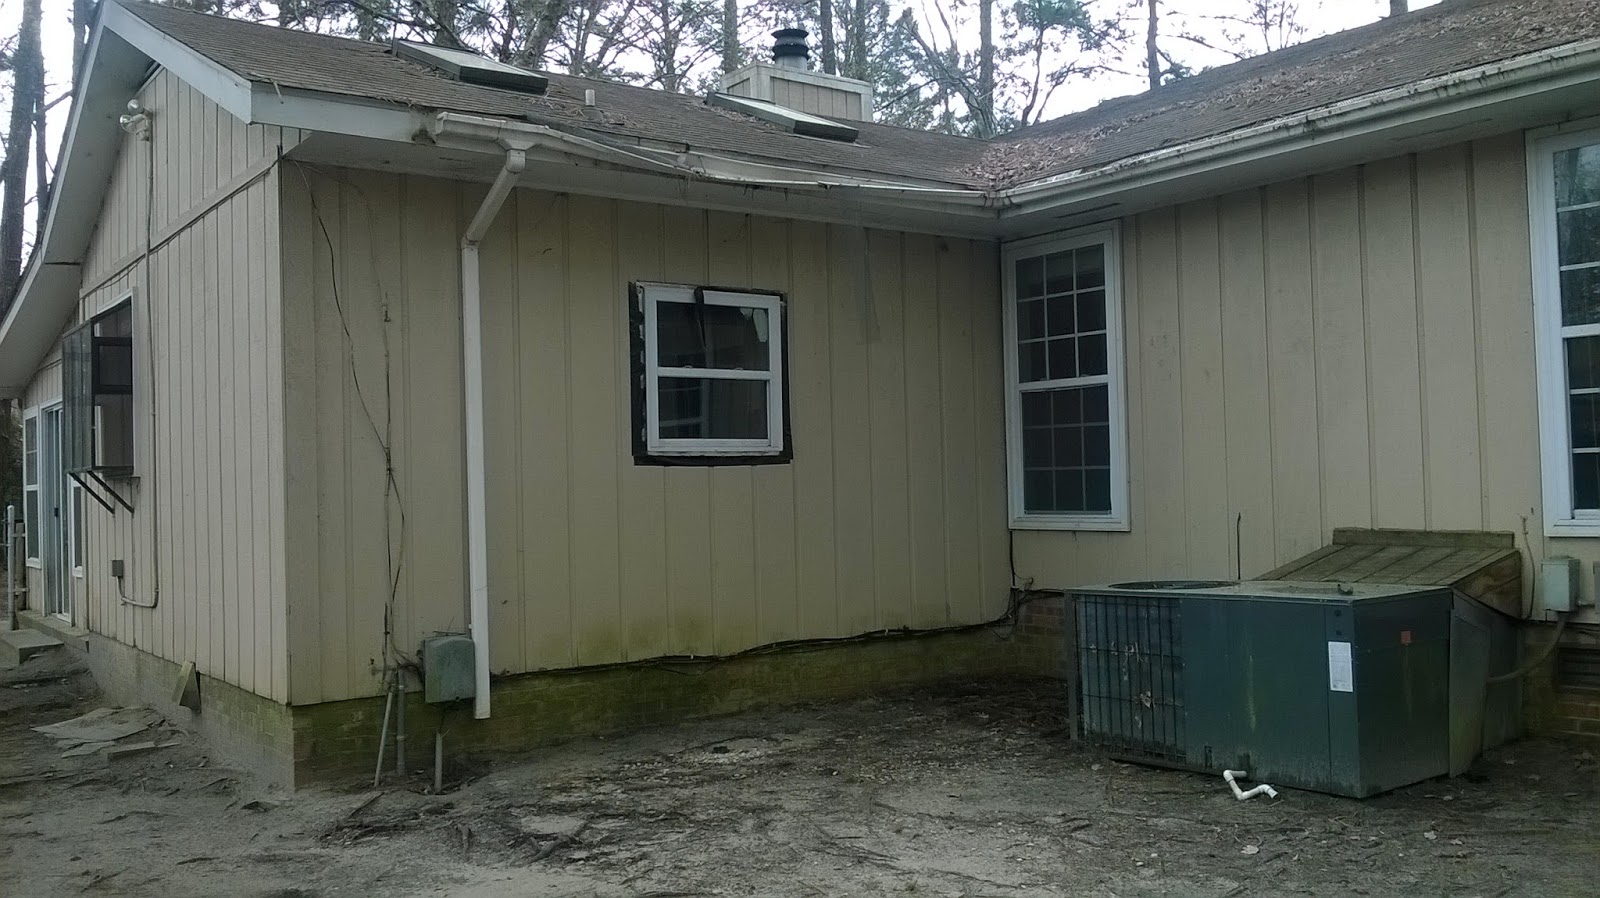
BEFORE: Pressure washing the bricks, covering exposed window framework,
and taking down broken gutters were essential to giving our house enough value
to pass our appraisal.  Every. Little. Bit. Helped.

You see, we were lucky to find such a large fixer upper in such great condition.  It's not typical in our area for fixer uppers to not be mold infested (we live in a hot coastal community), or otherwise highly damaged (floor rot, foundation problems, roof issues, etc).  Our 1975 home has 2200 square feet (compared to a typical 1500 square feet for homes of similar age in our neighborhood) and was for-the-most-part well taken care of by it's previous owner until he was too elderly and sickly to maintain it.  The previous owner had hand built the added 700 square foot Kitchen and Carolina Room addition.  He had also converted the garage into a closed-in climate controlled room in the house.  These two things are highly sought after in a fixer upper and often are the first homes snatched up when they come up for auction.

But other houses in our market had not been so lucky.   If the appraiser valued the house BELOW our agreed purchase price we would loose the house.  Sure, we could then renegotiate the price (adding potentially another month to the already lengthy process) or we could put more money down out of pocket to cover the difference (money that we had intended to use to renovate the house), but in this highly competitive fixer upper market and any delay could have meant loosing the house to someone who could pay cash.  So, we did what any self-preserving Fixer Upper enthusiast would have done: we fixed some of the house before the appraiser came.
BEFORE: The roof was completely covered in debris, so one of our first orders of business
 was to leaf-blow the roof to expose the close-to-new shingles, which we knew would
increase the value of our home.
AFTER: the roof was in great condition after being cleared.
This is definitely an asset our appraiser would look kindly on.
Now, I would NEVER recommend putting money into a home you don't own.  Raising the value of a home that your about to close on isn't typically a great idea.  You see, if you make a house worth more, than it's a possibility that the seller will come back and ask for more.  It's also a possibility that the seller will back down from your offer and keep all the improvements for themselves.  This is a highly risky and potentially counterproductive thing to do.  But, in our case it was all we could do to make sure our home was appraised for enough to cover our loan.

Previous roof leaks (that had been repaired)
were never repainted (which could be a "red flag"
for the appraiser) and stained needed to be removed
(another "red flag" for potential floor damage)
We had our inspector, a close friend, come out before the appraisal so that he could point out potential issues that could lower the value of our home or deem it "un-livable".  My husband worked countless hours fixing un-finished window framework, pressure washing (to make the house LOOK nicer) and covering issues that could be considered "red flags" for the appraiser (covering exposed utility boxes, repainting water stains on the ceiling of the enclosed garage, ripping up stained and potentially damaging carpet, fixing leaking pipes, scrubbing the scum left on walls and floors from years of neglect).  Then the day came for appraisal.  
We increased the aesthetic appeal (because first impressions are essential for home value)
by pressure washing, raking rocks, and covering exposed landscape tarps.

We waited on pins and needles that day.  Knowing that it would be cutting it close.  Our work paid off.  The houses added square footage, mostly-new roof, and the work that we'd put into the house increased the value to roughly $20,000 more than our purchase price.  The appraiser gave us a list of as-is comparables that were all valued less than our home and knowing that our home was a fixer upper, he also gave us a list of post-renovation comparables so that we could see what our home's potential was (comparables post-renovation were valued $50-$70K more than our home, with the highest valued home in the neighborhood being sold a few years prior on our street).  This was great news.  It meant our Fixer Upper was worth it.  Worth the hours.  Worth the extra stress.  Worth the investment.

My husband and I on closing day.

We went into our closing day knowing that our house was soon going to be our home.  A home we could pour our sweat and tears into to make it our own.  A home our children could grow up in, helping and learning right along side us.  We knew that this house was going to be a great adventure.

Do you have a house closing story you'd like to share?  Did you face complications in your house closing, inspection, or appraisal?  Share your comments below.